The route is always the same
Nine steps, in order, each unlocking the next. You never open a case and wonder what to click first, and neither does anyone you hire.
NexorCAD makes one appliance and makes it properly: the Aubé™ splint, a balanced splint with a flat occlusal table. Two intraoral scans in, a print-ready STL out, through nine steps that are the same every time.
Free for 14 days, with 3 exports. No credit card.Works with any scanner that exports STL or PLY
CASE-D58069CE
Lower · Aubé™ splint

Elapsed
00:00
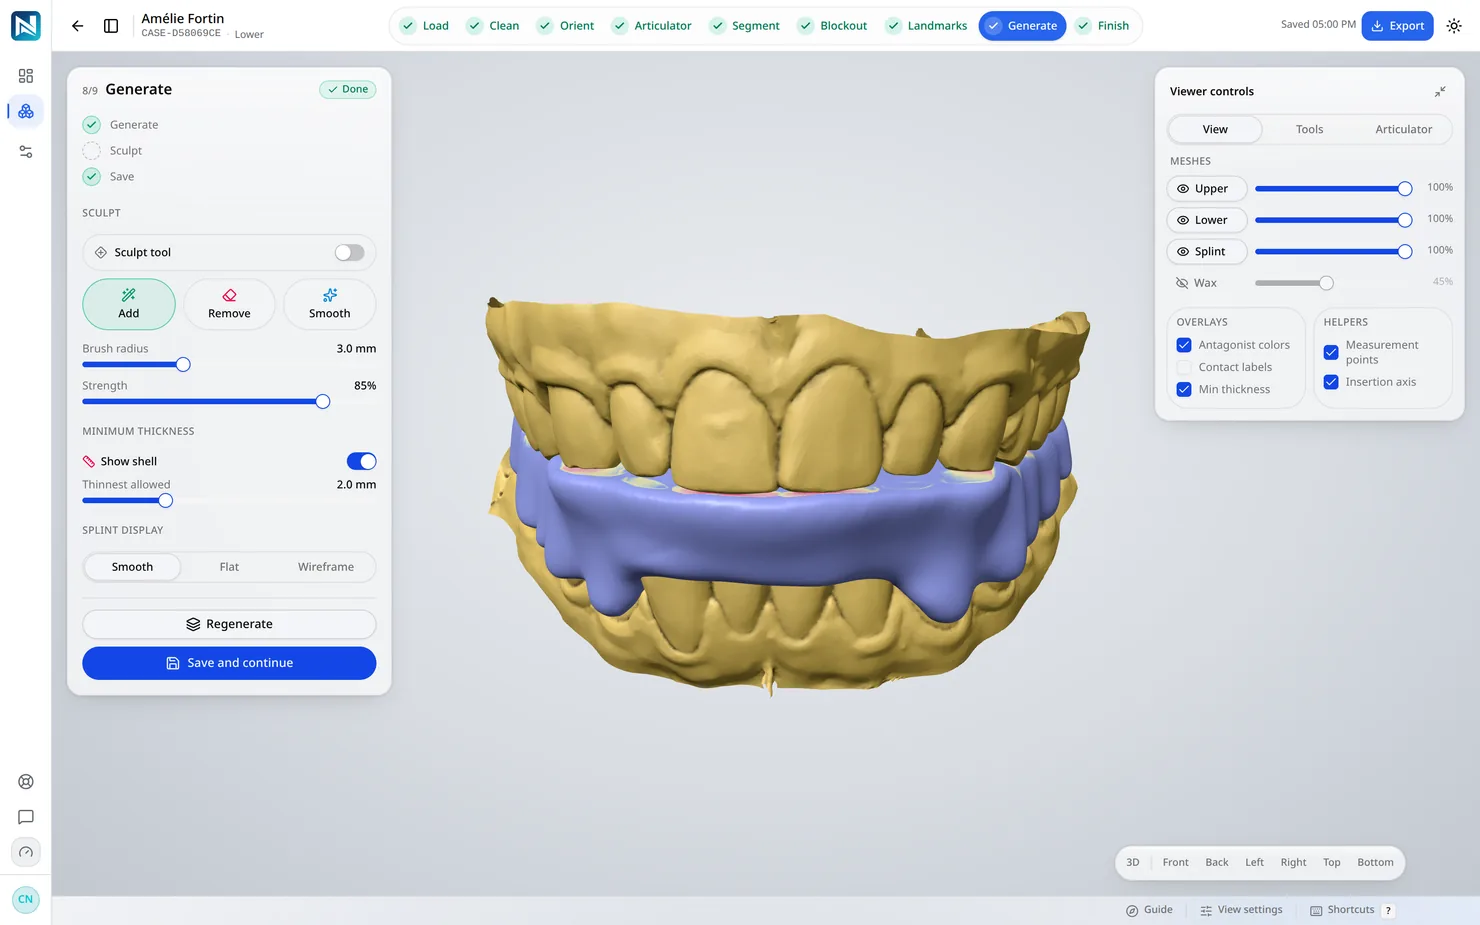
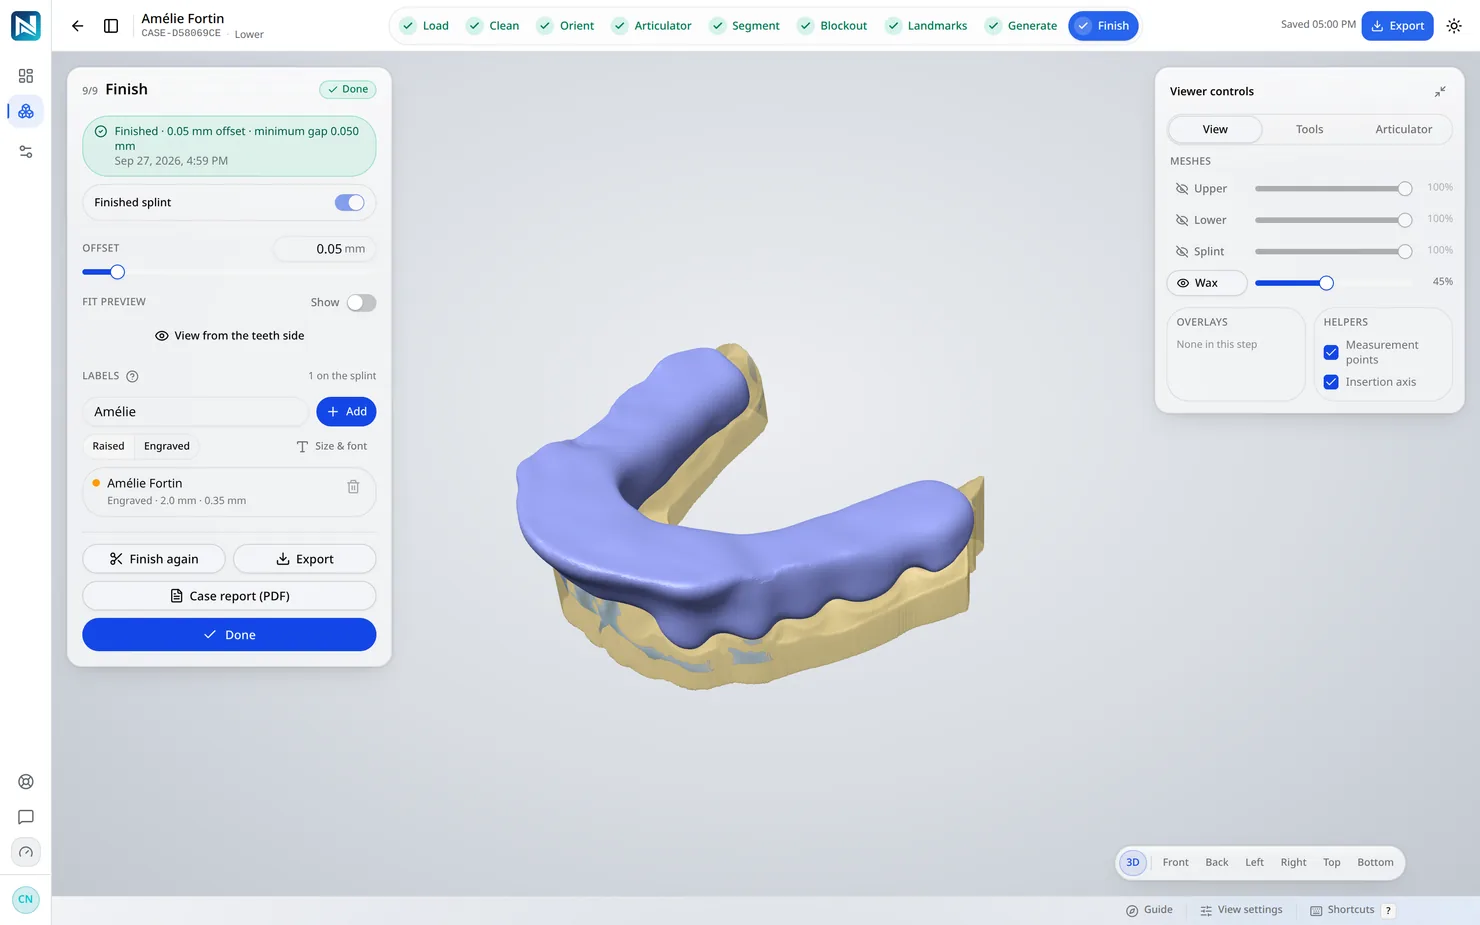
Live — Rendered in your browser from a real case: the lower arch and the Aubé™ splint designed on it, exactly as exported.
The difference
Splint design is not difficult work. It is repetitive work, and most CAD packages make you do all of it by hand, every case.
10×
less time at the screen
Designing a splint by hand
30 min – 2 h
Designing it in NexorCAD
5 – 10 min
Ten splints a week
Designing a splint by hand
a working day
NexorCAD
under two hours
What it is
NexorCAD is not a general CAD package with a splint module bolted on. It designs the Aubé™ splint, and that is the reason it is quick.
We would rather you know that now than find out after you have paid.
The nine steps
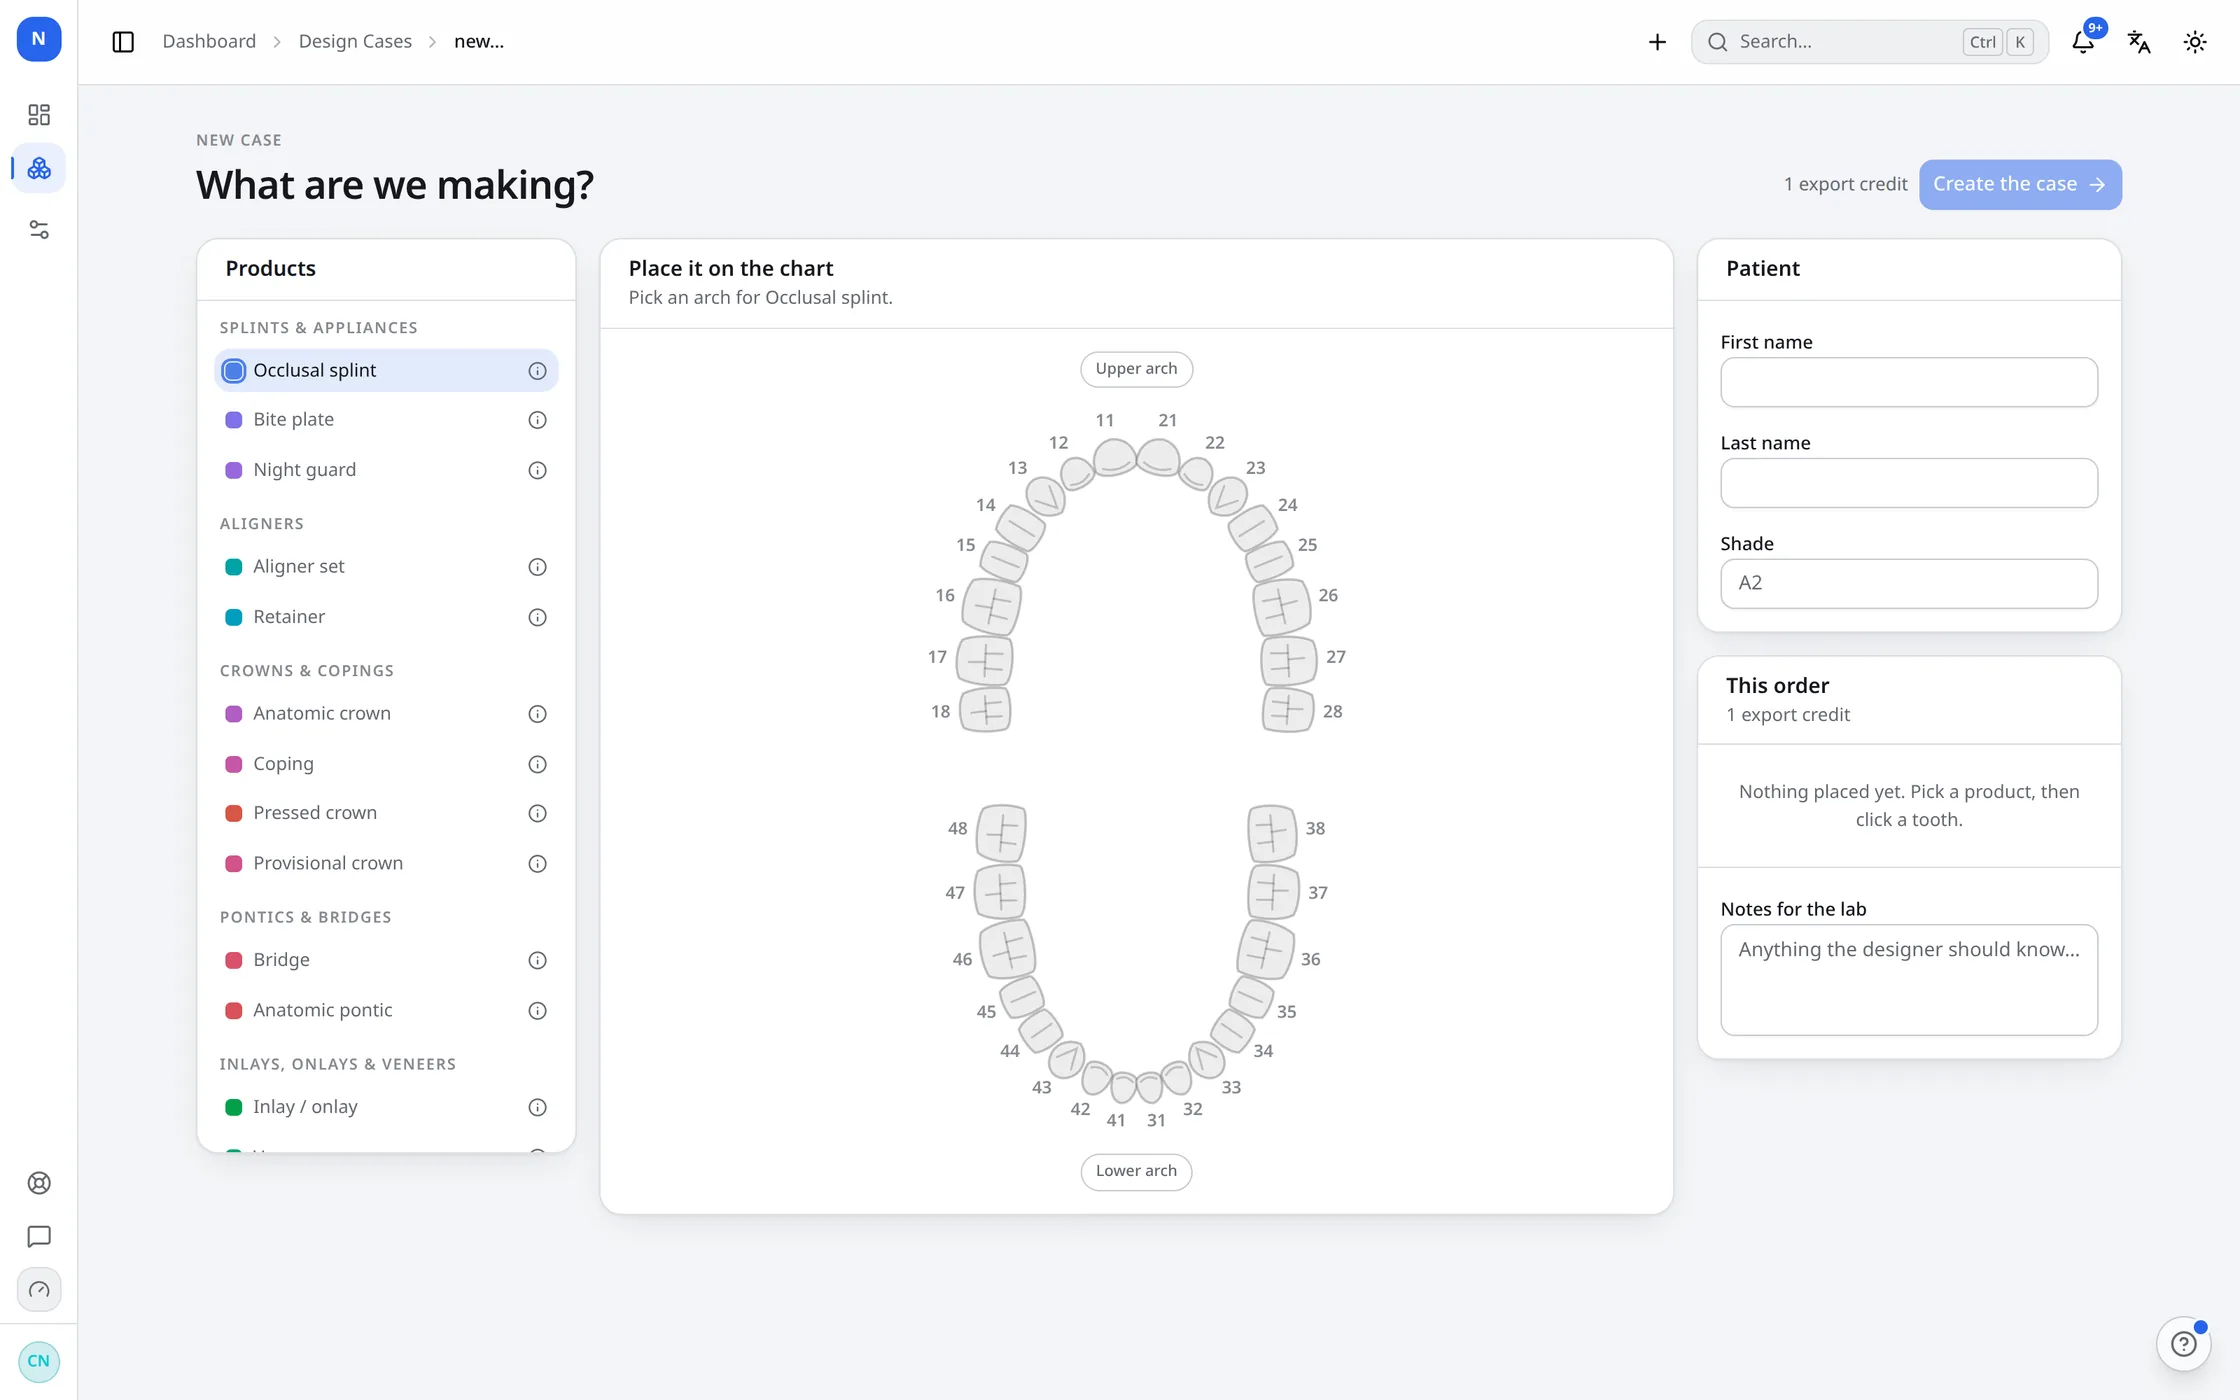
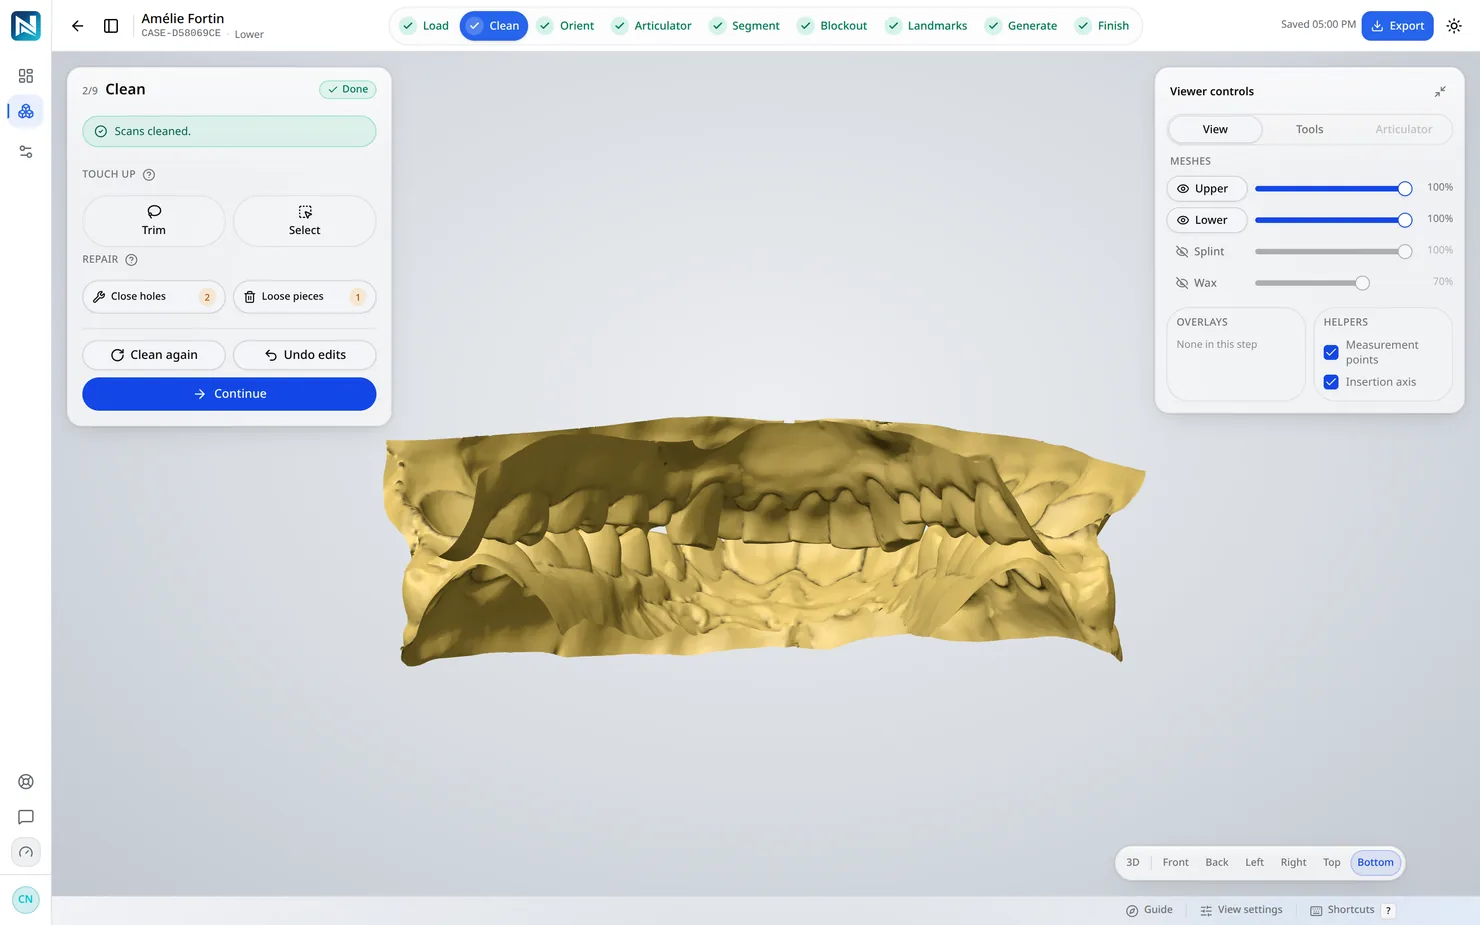
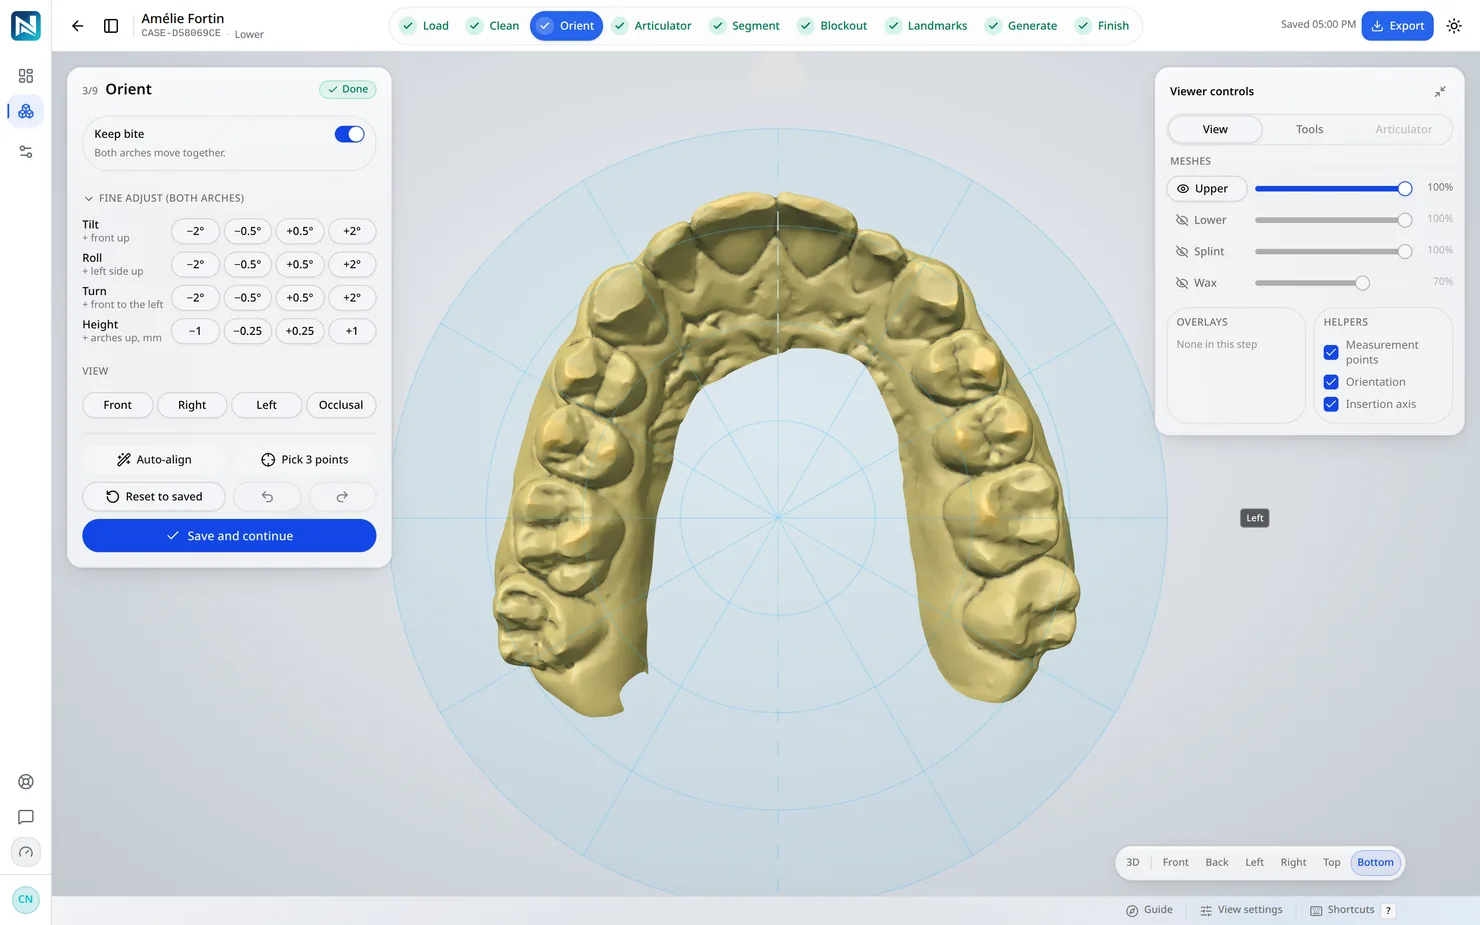
Every screen below is the running application, not a drawing. This is the whole job.
01
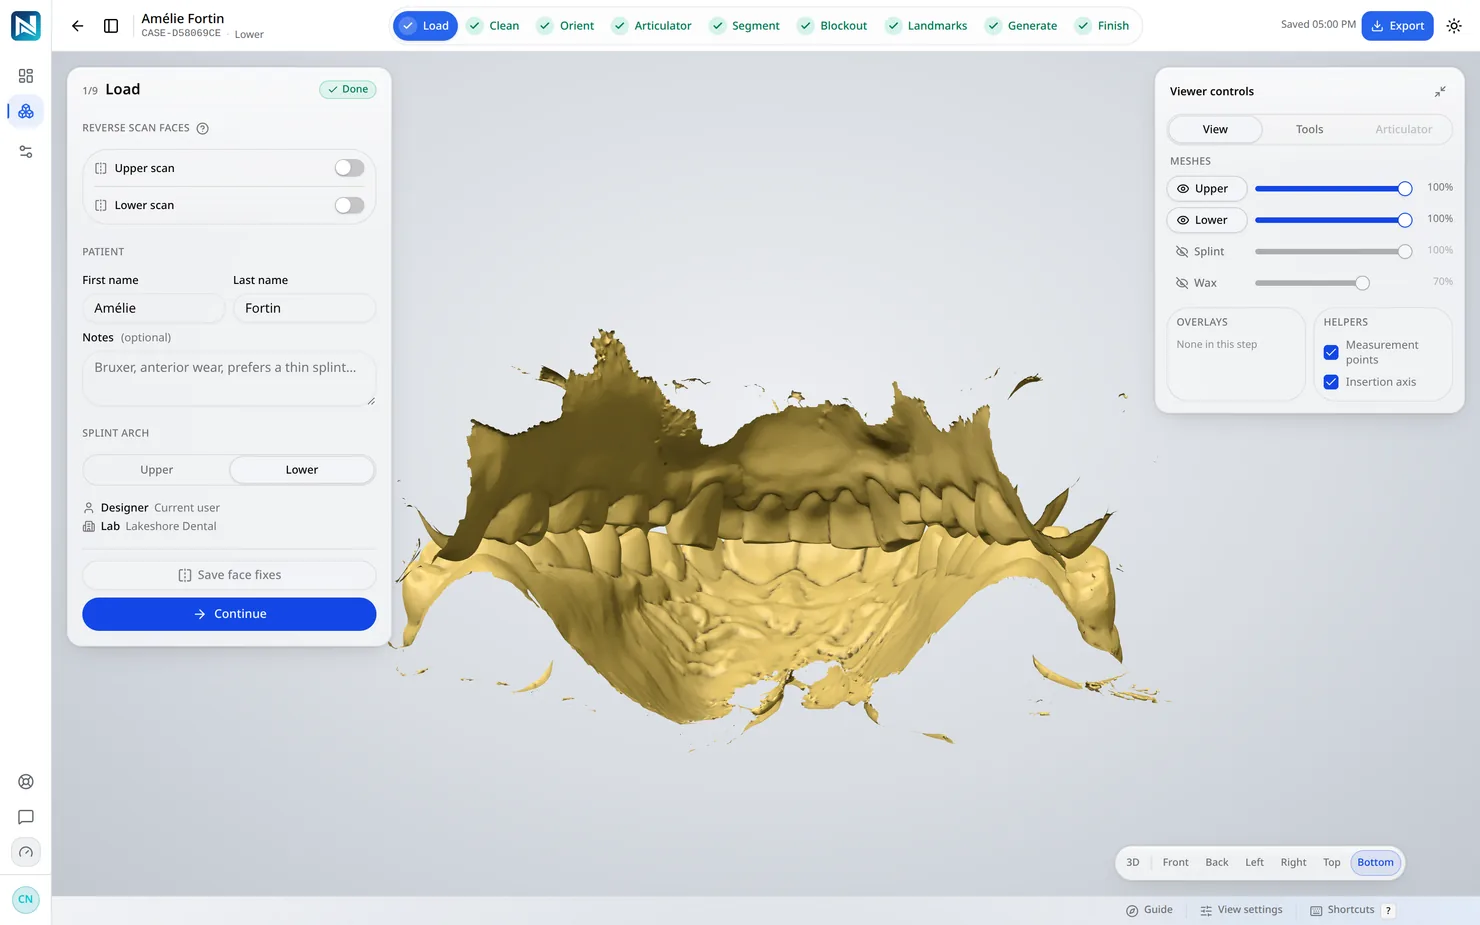
Drop in the upper and lower scans exactly as the scanner exported them. STL or PLY, no conversion.
02
Loose fragments, spikes and holes go, and the mesh is closed, so nothing downstream trips over bad geometry.
03
The arch is set on the occlusal plane. Everything after this measures against that, which is why it happens early.
04
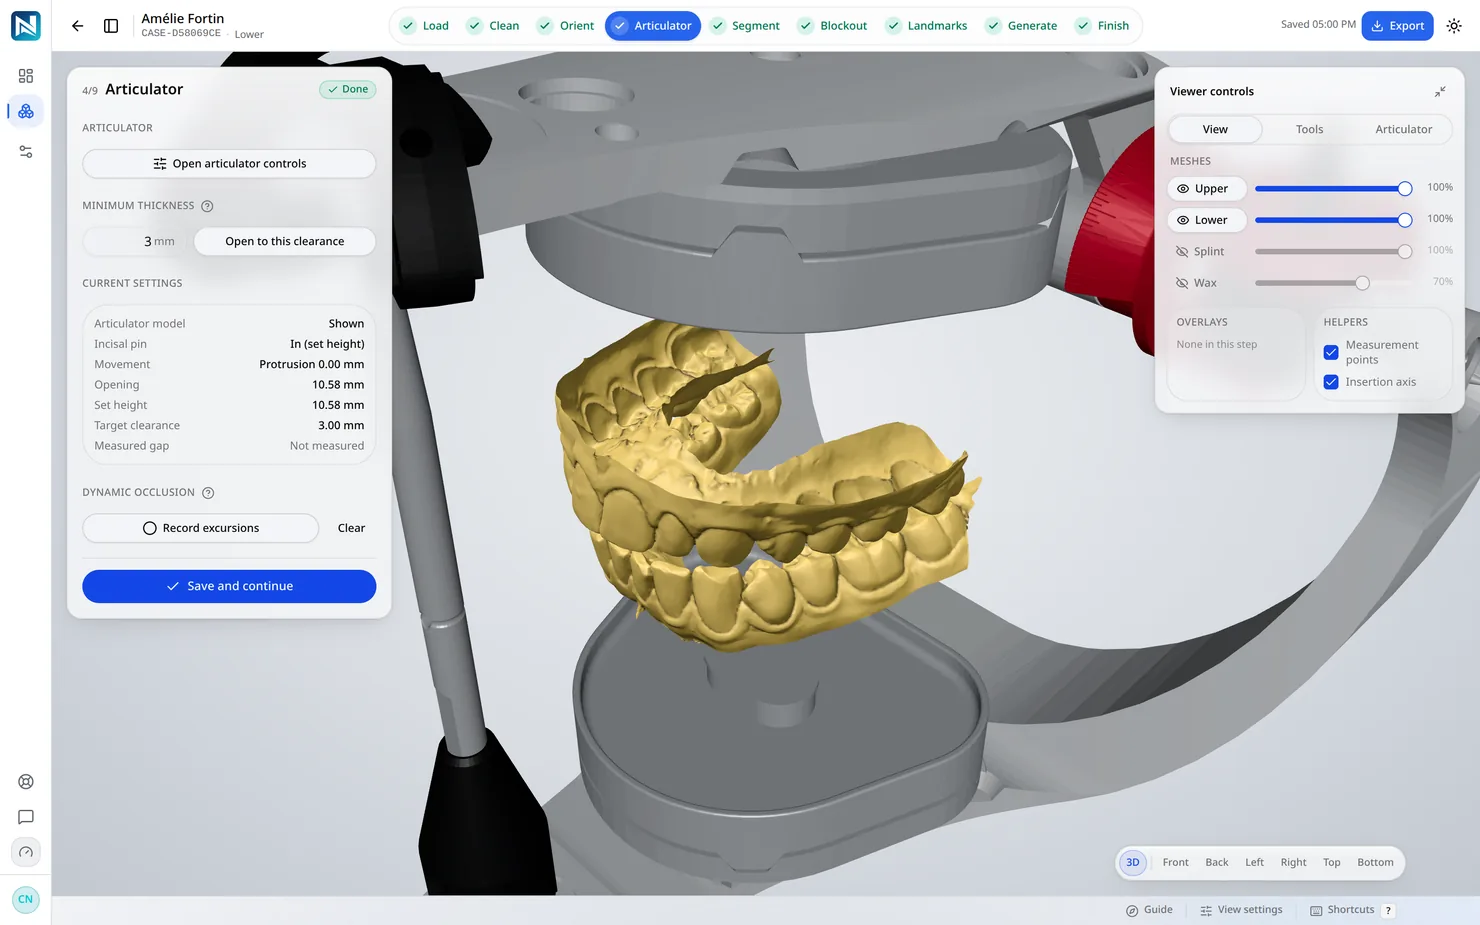
The two arches are brought into occlusion and the bite is fixed, so the table is built against a real antagonist.
05
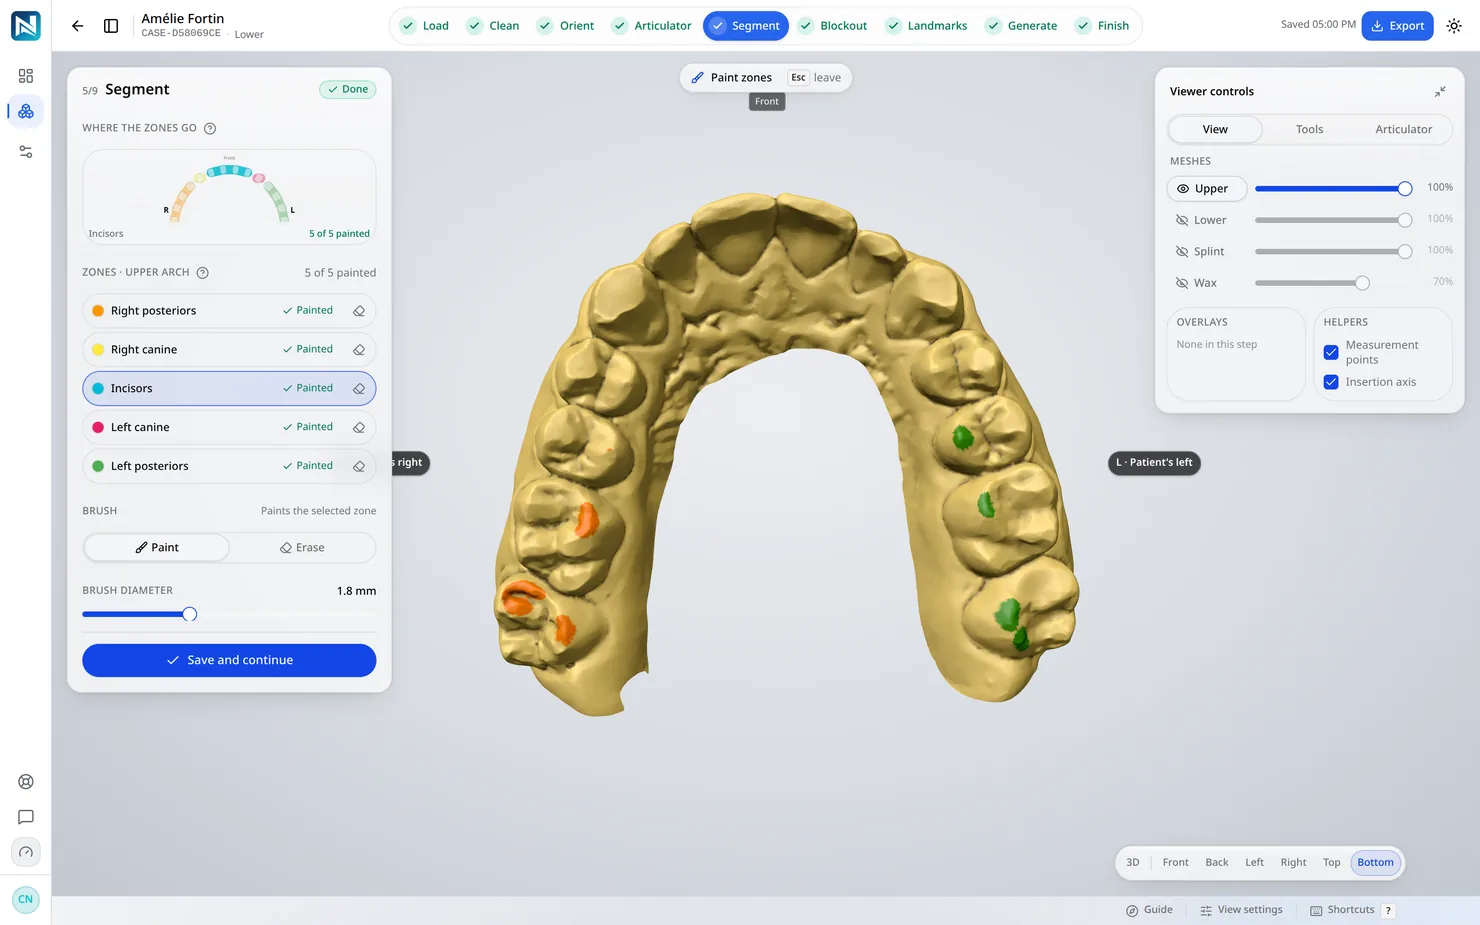
Teeth are separated from gingiva. The splint has to know what it sits on before it can decide where to grip.
06
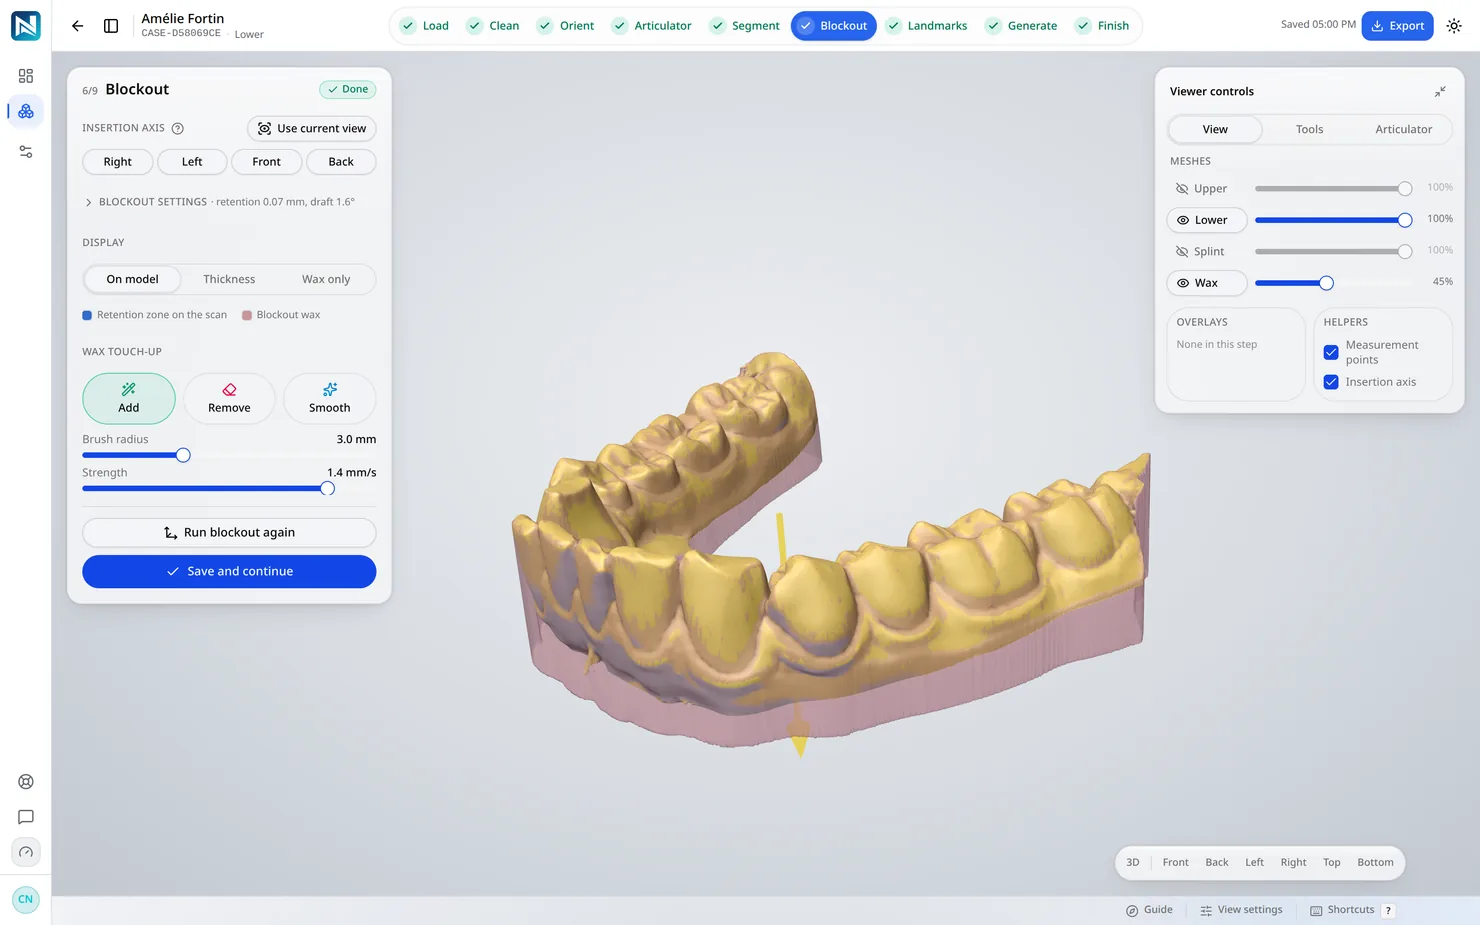
Undercuts are shown on the scan, then filled with wax along the insertion axis. You choose what holds and what lets go.
07
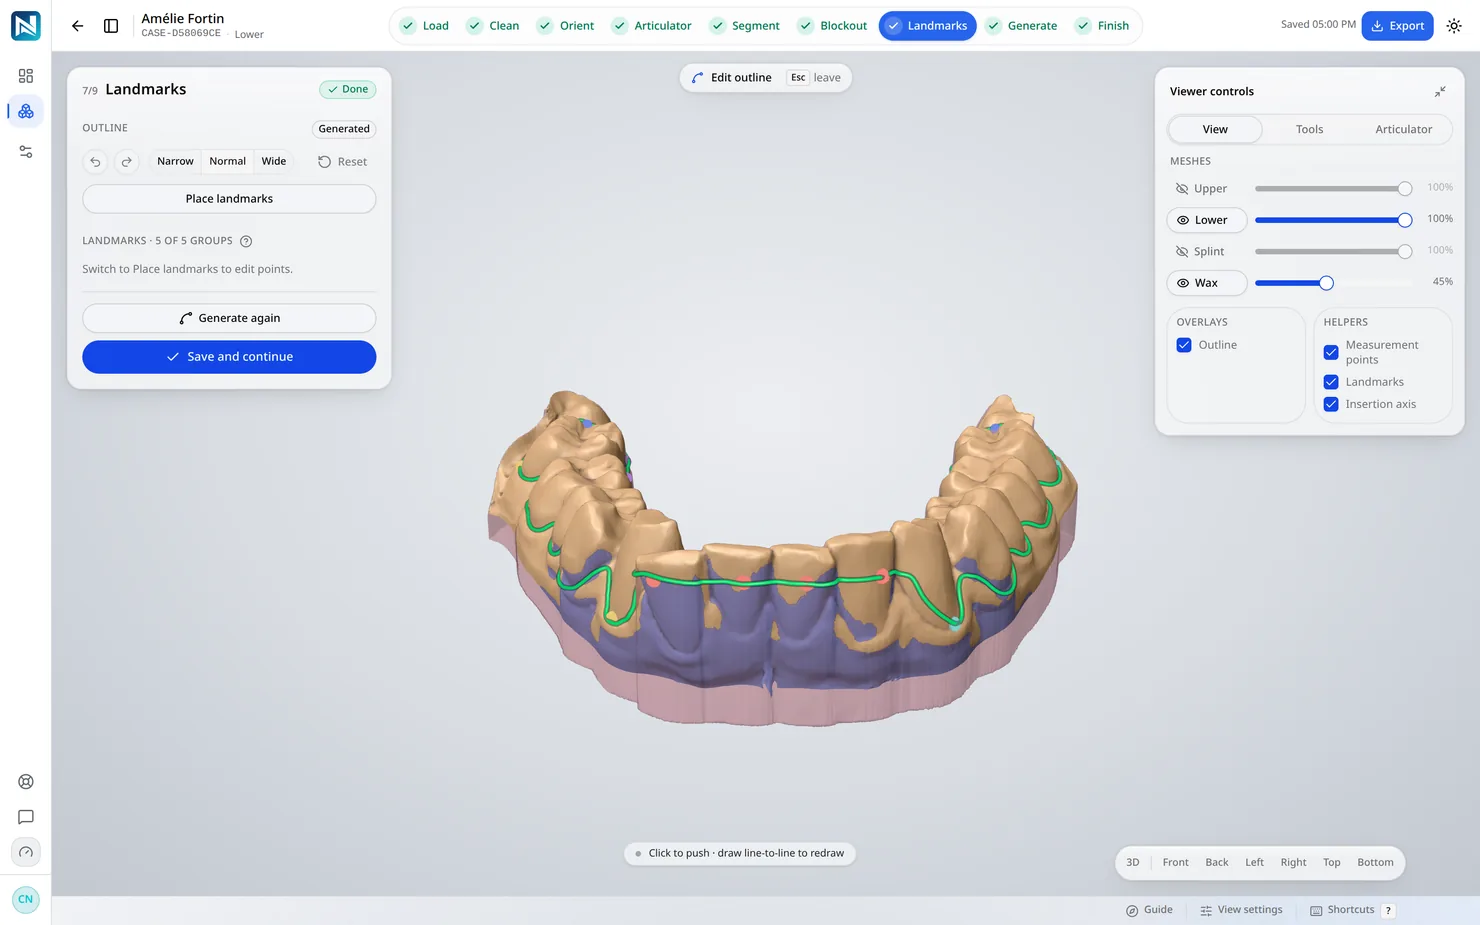
Draw the border once. It follows the arch and spans a diastema rather than dropping into it.
08
The shell is built over the blockout in one pass: coverage, wall height, thickness and the flat occlusal table.
09
The wax is cut away, the fitting surface is relieved, the case is written into the mesh, and the STL is ready for the printer.
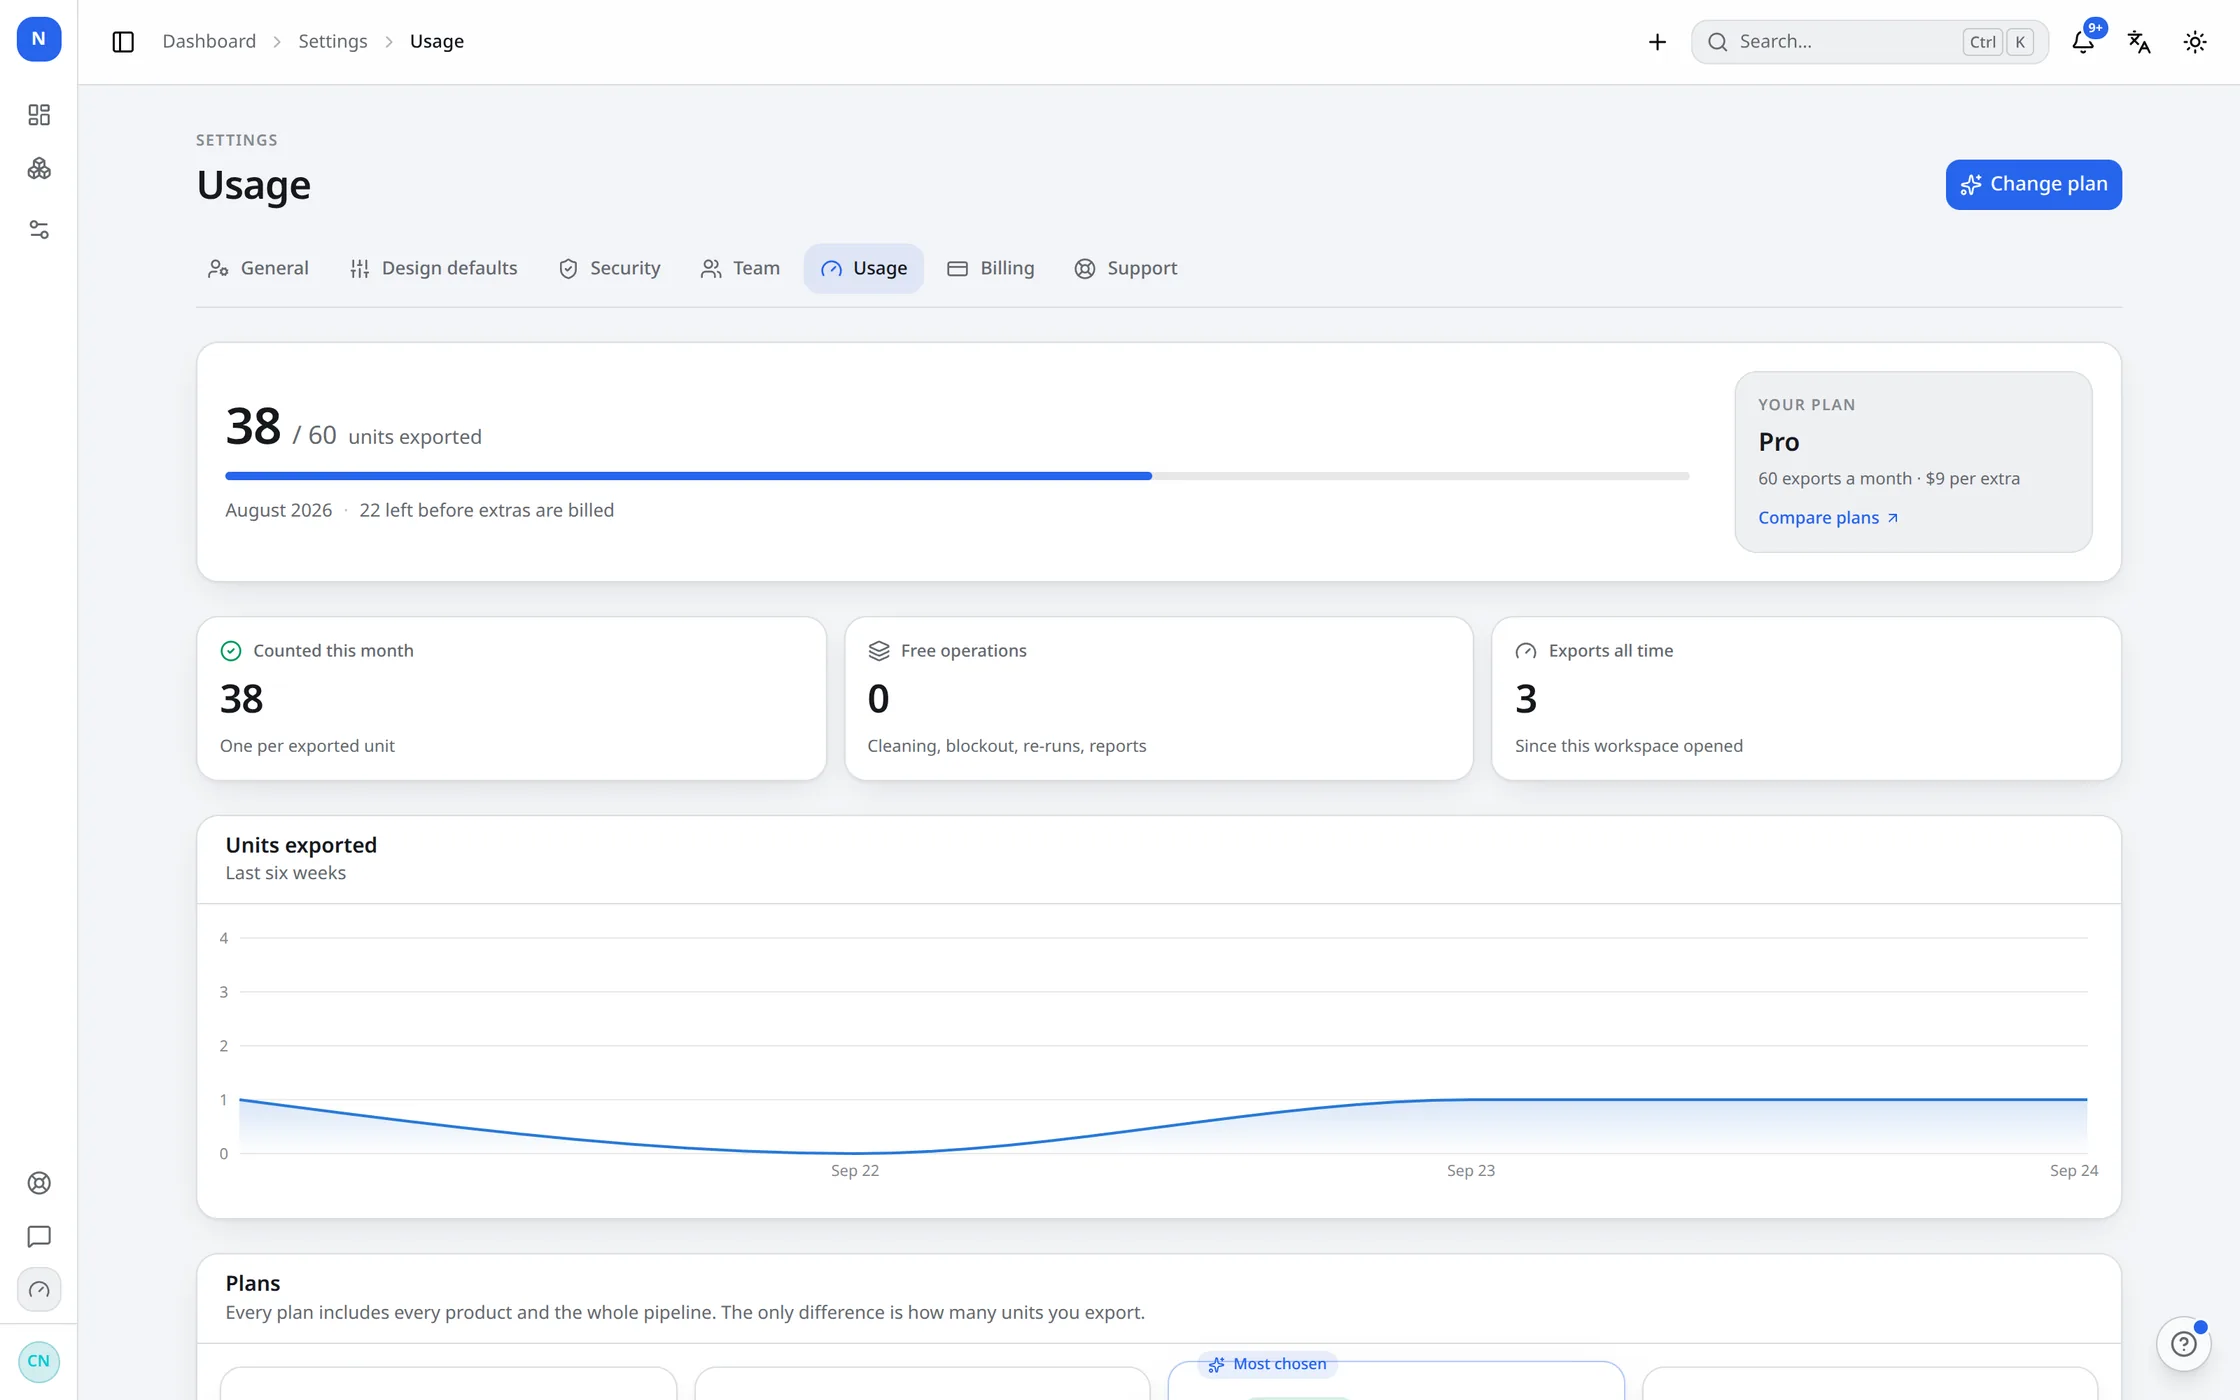
Cleaning, orienting, re-running a step and regenerating a report are unlimited on every plan. You are only counted when you export.See the nine steps →
Why it is quick
None of this removes a decision from you. It removes the dragging, the re-measuring and the guessing.
Nine steps, in order, each unlocking the next. You never open a case and wonder what to click first, and neither does anyone you hire.
Undercuts are found along the insertion axis and filled with wax. You are shown them on the scan first and you choose which ones keep the splint on.
A flat, balanced table with an even stop on each opposing cusp, in one pass. This is the part that takes the longest by hand.
Trace it once. It follows the arch, snaps to the teeth and jumps a gap instead of diving into it.
The shell is offset from the blockout wax, the surface the splint really sits on — not from the raw scan. The minimum you set is the minimum that prints.
It runs in the browser on the machine you already have. No licence per workstation, no graphics card to specify, no update to schedule.
What to expect
The rest of it
The parts that make it a working day rather than a demo.
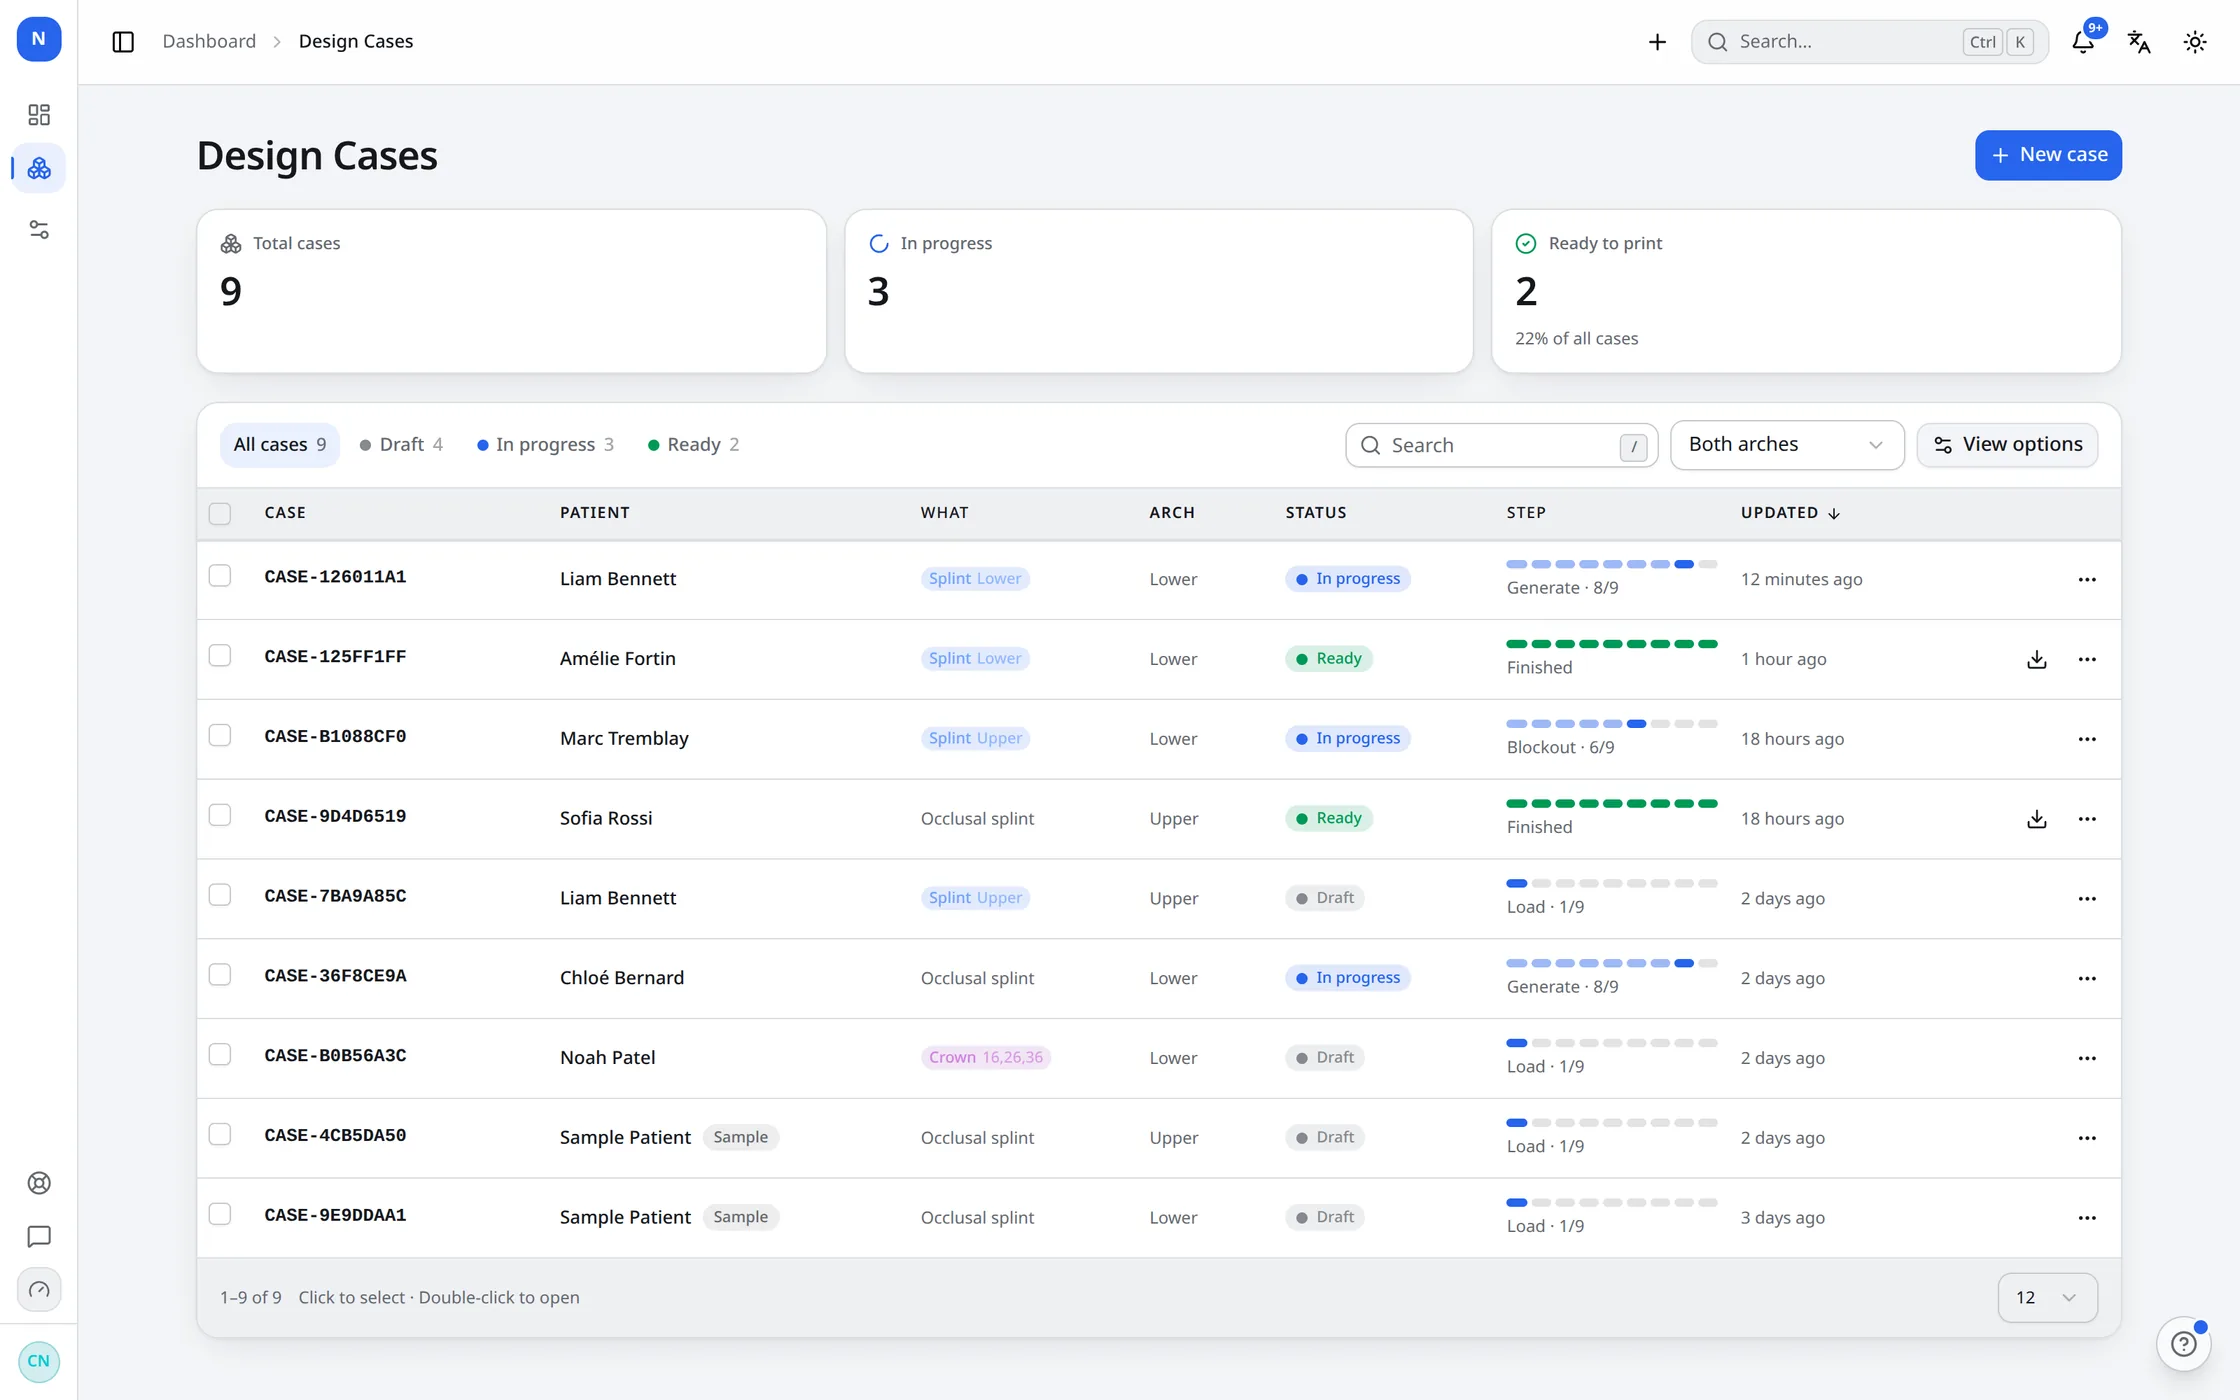
Nine dots a row tell you which step each case reached. Filter, search, and pick up exactly where you stopped.
Pricing
One number to understand: how many splints you can export in a month. Designing them, redoing them and reporting on them is unlimited.
Try it on a real case
Free
for 14 days
Start freeOne practice
$85CAD/month
billed monthly
Choose StarterA busy clinic
$195CAD/month
billed monthly
Choose ProA production lab
$330CAD/month
billed monthly
Talk to usCanadian dollars, excluding tax. Change plan or cancel whenever you like.
Straight answers
Your scans, your cases and the splints designed from them belong to you. Export them whenever you like, including on the way out.
Five to ten minutes is what we get on our own cases. We are telling you where the number comes from rather than putting it in a badge.
Splints work and are in daily use. The other appliances in the catalogue are not built yet, and the site says so rather than implying otherwise.
Plans are monthly and end with the period you paid for. There is no notice period and nothing to sign.
Questions
That is what we measure on our own cases, from the two scans to a finished STL. Your first few will take longer while you learn where things are — an afternoon, not a course. The gain is real because the slow parts, the blockout and the occlusal table, are the parts that are automatic.
A full-arch occlusal splint with a flat, balanced occlusal table: an even stop on each opposing cusp, and guidance that lets the mandible move without interference. It is the appliance NexorCAD is built around, which is why it can be quick about it.
Any of them. If it exports an STL or a PLY of the upper and lower arches — and every current intraoral scanner does — NexorCAD reads the file directly, with no conversion step.
No. NexorCAD finishes at a print-ready STL. Print it yourself, or send that file to whoever prints for you.
One export credit per splint you take the file for. Designing, redesigning, re-running a step and regenerating a report cost nothing. The free trial gives you 14 days and three exports, and finishing the sample case never uses one.
Yes, and each person chooses. The whole application is translated, with the clinical vocabulary right in each language.
They stay in your workspace, on our own servers in Québec, reachable only by people you invited. A case you delete is purged within 30 days. You can export everything at any time, including when you leave.
At any time. You keep access to the end of the period you have paid for, and the cases and exports you have already made stay yours.
Fourteen days and three exports, free, on your own cases — and the sample case that comes with every new workspace never counts.
No credit card. Setting up takes about two minutes.